Hi, everyone! I’m Haley from Heart Nouveau Designs, and I’m so excited to be featured on Little Red Knits’ Friday Freebie blog!

I’ve been a maker all my life, but about 13 years ago, I picked up a hook and yarn and knew that this was my thing. After working my way through the wonky scarves and ill fitting hats, I hit my groove.
I loved creating and designing pieces, but realized that there was no way I could ever wear all the scarves and hats I’d been creating, so I started selling at local craft shows. This was a lot of fun, but hard to keep up with once my daughter came along. I took a bit of a break from craft shows and my business while caring for my daughter, and now also my son. But I’ve missed designing crochet pieces. I don’t have the time to keep up with inventory for craft shows like I used to, so I decided to start my blog!
My blog is new, but it has already been so much fun! I love seeing people making things I’ve designed! I offer my patterns for free because when I was starting to learn to crochet, I was so appreciative to designers who offered their patterns for free. I was still learning, and I couldn’t afford to spend money on patterns I wasn’t sure if I would be able to complete. So I hope to be be able to spread the excitement I felt over an awesome free pattern to other crochet enthusiasts!
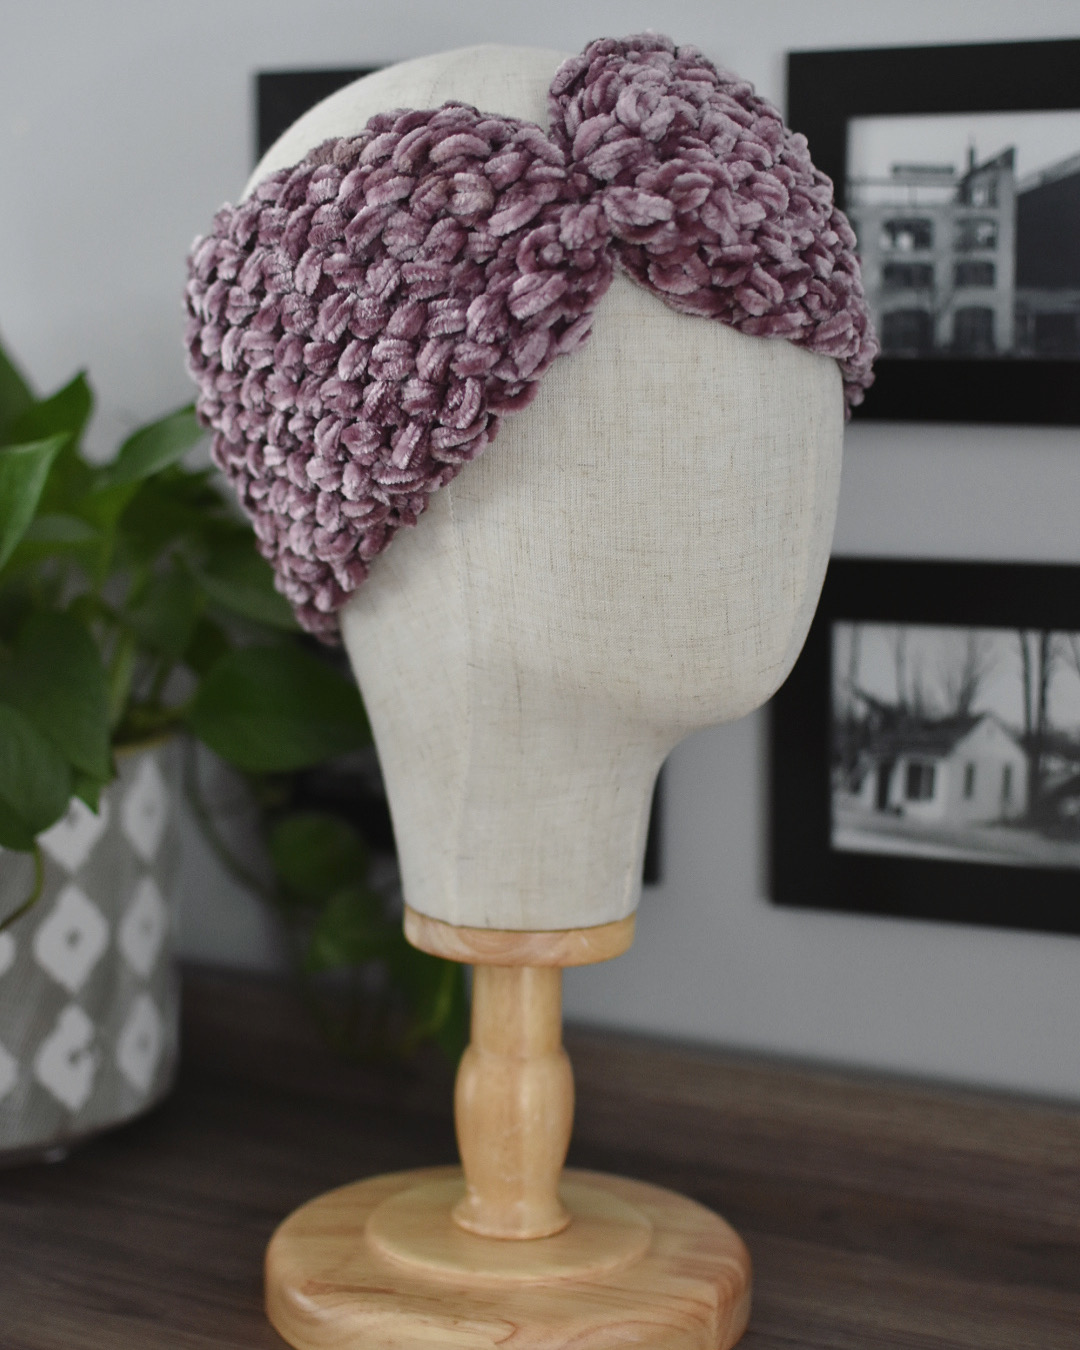
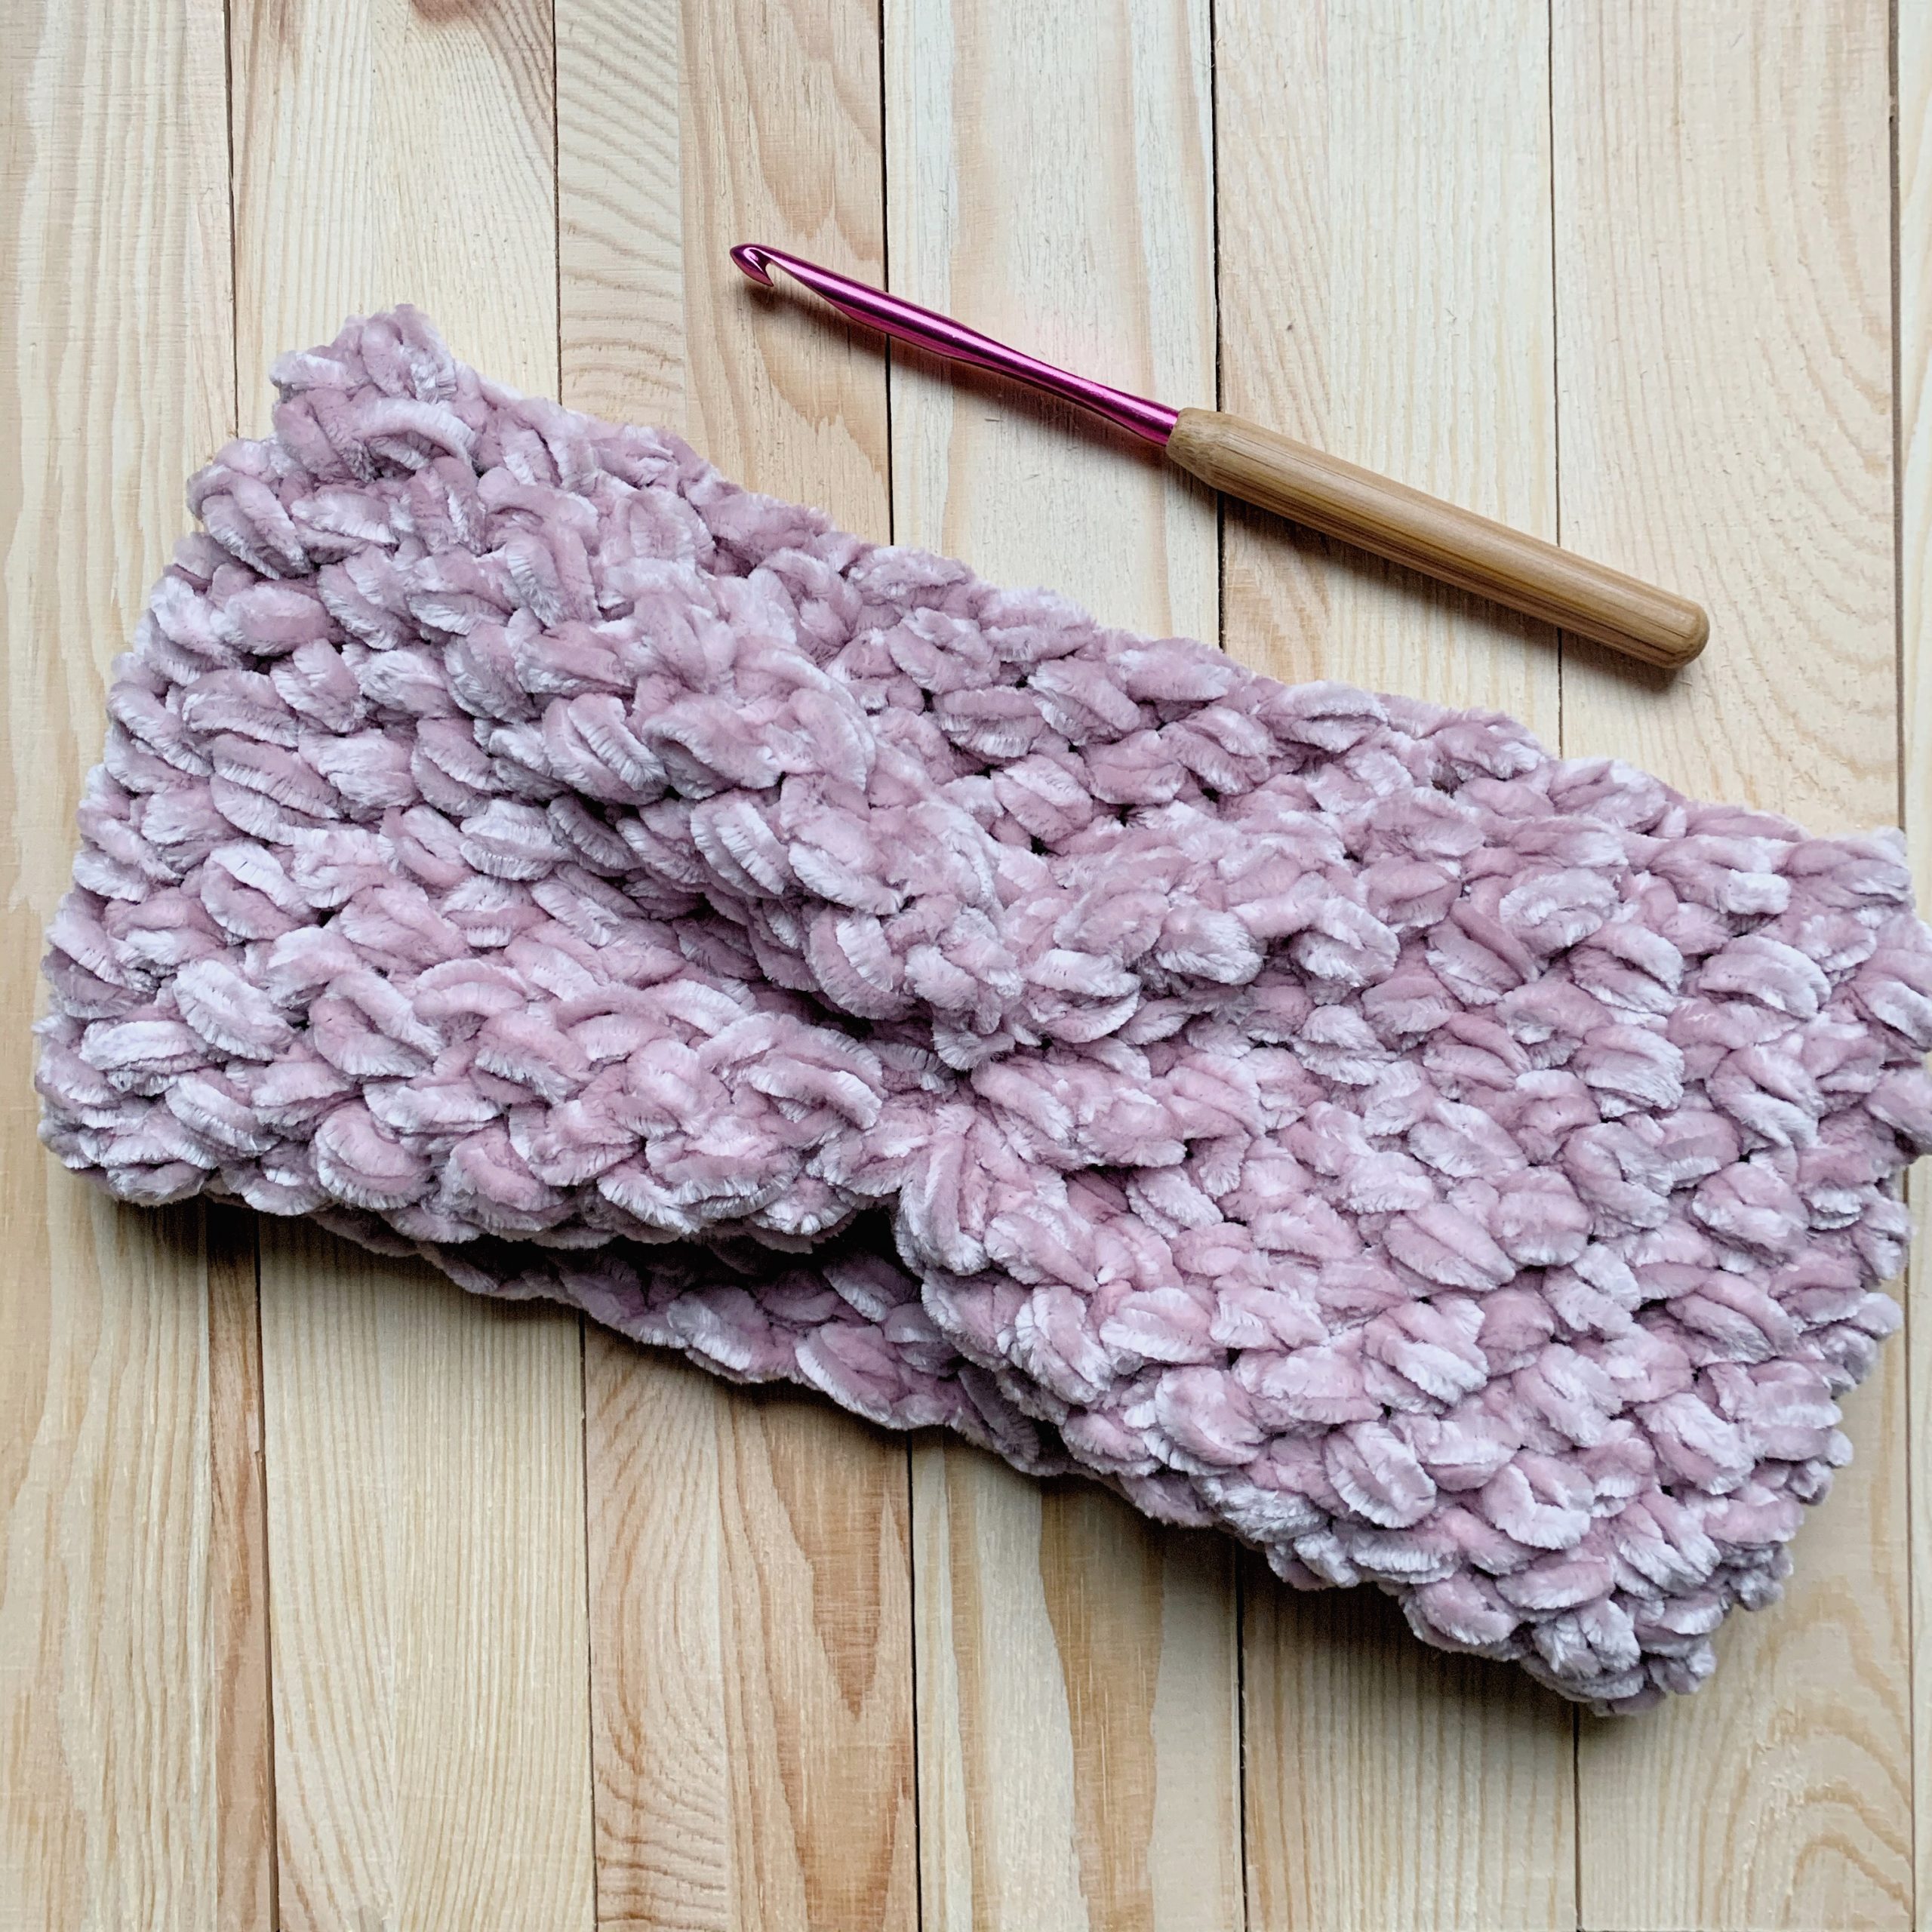
Today, I want to share with you one of my favorite patterns right now, my Velvet Puff Stitch Ear Warmer. I love making ear warmers, being that I live in northern Ohio, it gets pretty cold in the winter, so I can easily throw one of these on while my hair is up and head out the door. While playing with this yarn for another project I was working on, I decided to try the puff stitch and wow. Puff stitches in velvet yarn are just extra puffy and so fun. I knew right away that my next project was going to be entirely puff stitches. Enjoy!
Velvet Puff Stitch Ear Warmer
MATERIALS
- 1 skein Bernat Velvet Yarn in desired color
- US I/5.5 mm Crochet Hook
- Tapestry Needle
- Scissors
FINISHED SIZE
4.75” wide x 22” circumference, sewn together
GAUGE
4” = 9 rows x 7 puff stitches
ABBREVIATIONS
- ch – chain
- sl st – slip stitch
- st(s) – stitch(es)
SPECIAL STITCHES
- Puff Stitch
To create the puff stitch, insert hook into stitch, yarn over and pull up a loop. Insert hook into same stitch, yarn over and pull up a loop. Insert hook into the same stitch for a third time, yarn over and pull up a loop. Yarn over and draw through all loops on hook. Chain stitch to finish.
PATTERN
Create a slip knot, leaving a 6″ tail, ch 17
Row 1: Puff st into 3rd ch from hook, *skip next ch, puff st in next ch, repeat from * to end of row. Turn. (8 puff sts)
Row 2: Ch 2, puff st between each puff st from the previous row, puff st into the top of the first skipped ch sts of previous row. Turn. (8 puff sts)
Row 3-50: Ch 2, puff st between each puff st from the previous row, puff st into the top of the ch 2. Turn. (8 puff sts)
Tie off leaving a long tail for sewing.
Thread the long tail onto a tapestry needle and sew together the two short ends.
To scrunch the front, weave the needle back to front along the sewn seam. Pull the tail tightly. Knot the sewing tail to the tail from the beginning chain. I’ve found that velvet yarn can be very slippery and knots can sometimes work apart over time, so make sure to knot these ends securely.
Weave in the ends.
And there you have it! Don’t forget to follow @HeartNouveauDesigns on Instagram and tag any projects you make with #heartnouveaudesigns. I would love to see what you make!
Stay cozy!
-Haley
http://www.heartnouveaudesigns.com
![[NEW PATTERN] Gridlines Baby Blanket](https://littleredknits.com/wp-content/uploads/2023/10/3-500x383.png)
![[NEW PATTERN] Bubble Tote Bag](https://littleredknits.com/wp-content/uploads/2023/09/8-500x383.png)
![[LUCERNE FRINGE SCARF] New Knitting Pattern + Kit!](https://littleredknits.com/wp-content/uploads/2023/09/3-500x383.png)
![[NEW PATTERN] CONTENTO WRAP](https://littleredknits.com/wp-content/uploads/2023/09/1-500x383.png)
![[NEW YARN + NEW PATTERN] Haddington Cowl](https://littleredknits.com/wp-content/uploads/2023/08/Haddington-Cowl-1-500x383.png)